
Current WordPress Plugin Version:
- 4.0.1
Server Requirements:
- At least PHP 5.3 on your server.
- Provided store URL cannot be a 301 redirect
-
Step 1: Get Woocommerce
Make sure you have the most recent Woocommerce plugin installed in WordPress. You can do that by visiting the Plugins page in your WordPress setup to make sure there isn't an update available.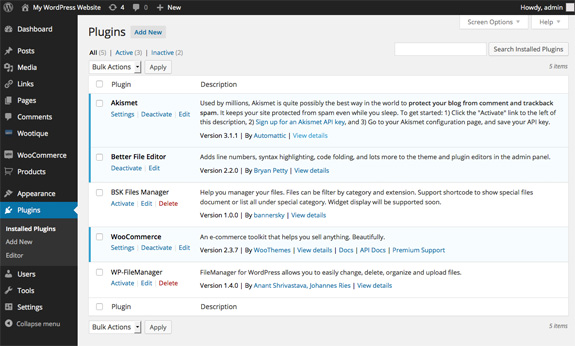
-
Step 2: Check for Updates
On the same Plugins page confirm you don't have any Maintenance mode or Coming Soon plugins as they disable any connection to the API and will disable our application. -
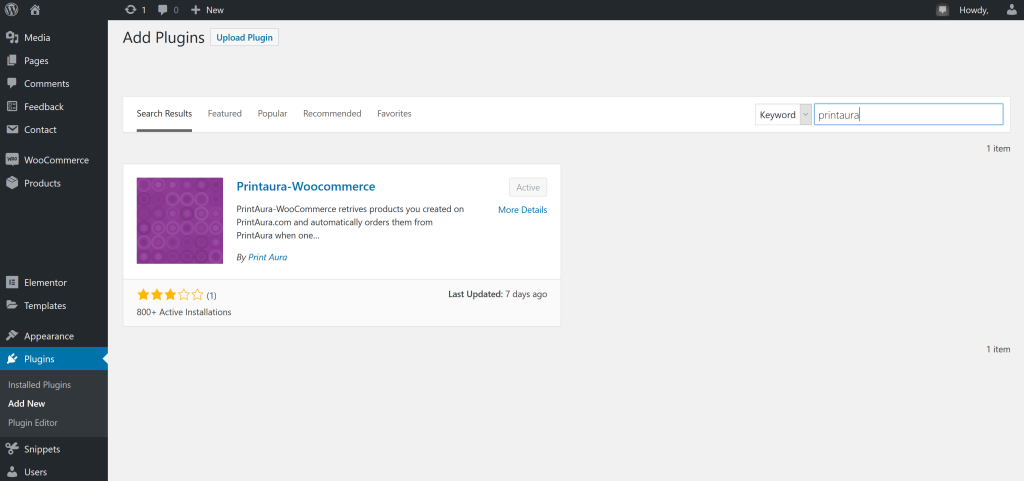
Step 3: Get the Printaura Plugin
Install and activate the wordpress plugin by searching for "printaura" on the wordpress plugin store.
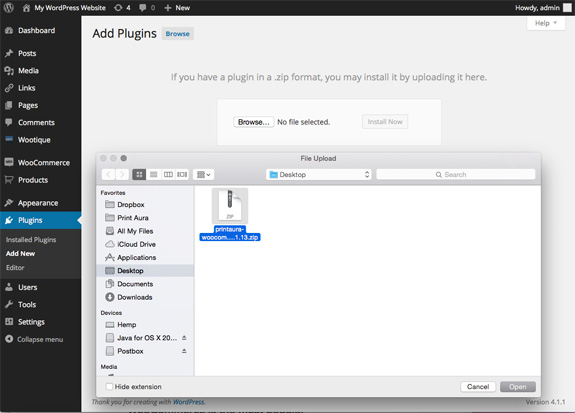
You can also download the Printaura Woocommerce plugin here and install it in your WordPress plugins. Download and install through directly through WordPress. Plugins > Add Plugins > Upload Plugin
Browse for the newly downloaded Printaura Plugin and click Open > Install > Activate Plugin.
-
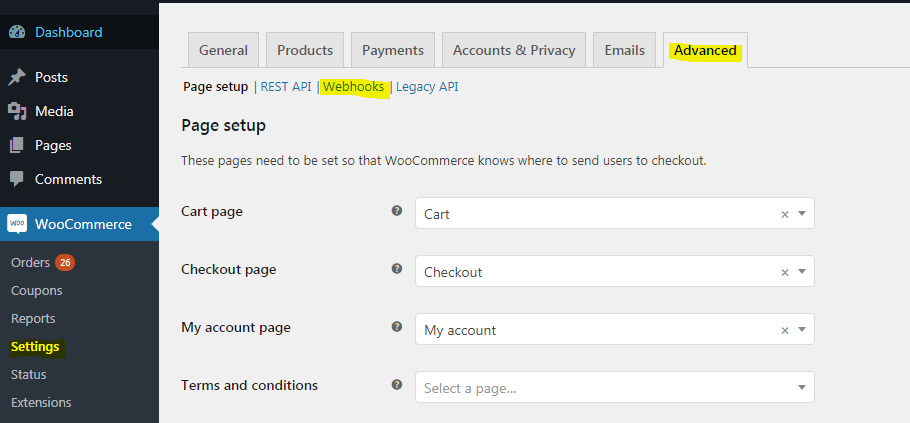
Step 4: Verify Webhook Version
In order for the webhooks to fire and send the order to us the printaura webhooks will need to be set to the correct version.
Under The Woocomerce tab navigate to settings >> advanced >> webhooks
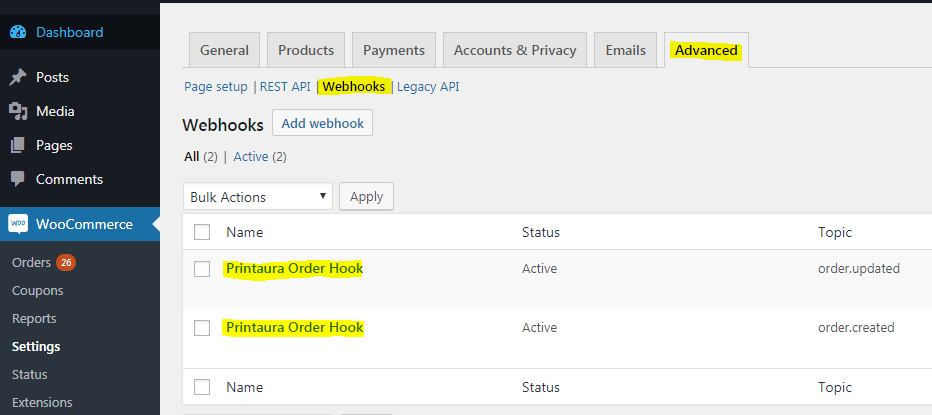
Edit both of the "Printaura Order Hook" webhooks one at a time.
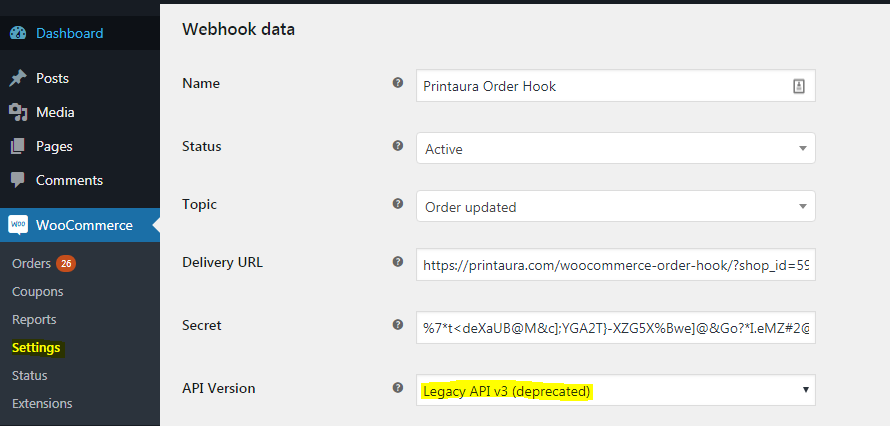
In the "Webhook data" menu select "Legacy API v3" and click save. Do this for both webhooks. If they are already set to "Legacy API V3" then you will not need to change anything.
-
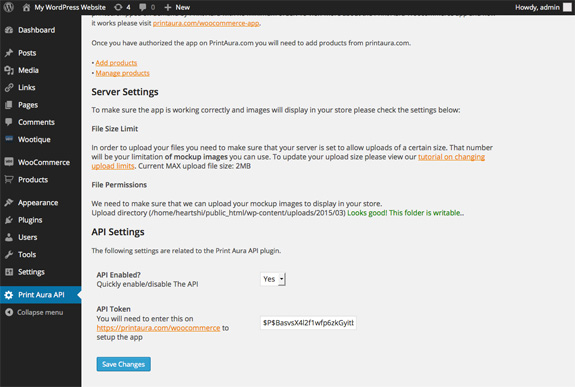
Step 5: Check Server Settings
Check server settings by clicking on the new link to Printaura API. You may not need to deal with this now but good to know where to check if you have issues once you start with the app.- File Size Limit - Note the max size of your file upload limits. This number will limit how big your store mockup images can be that you upload. If you need to update your file size limits visit this file size limit tutorial.
- File Permissions - You should see a "looks good This folder is writable". If not, you will need to update your server settings
-
Step 6: Enable Pretty Permalinks
Enable Pretty Permalinks in Settings > Permalinks. Change the Common settings to Post Name. Under Product Permalink Base you can change it to any of the options besides Default.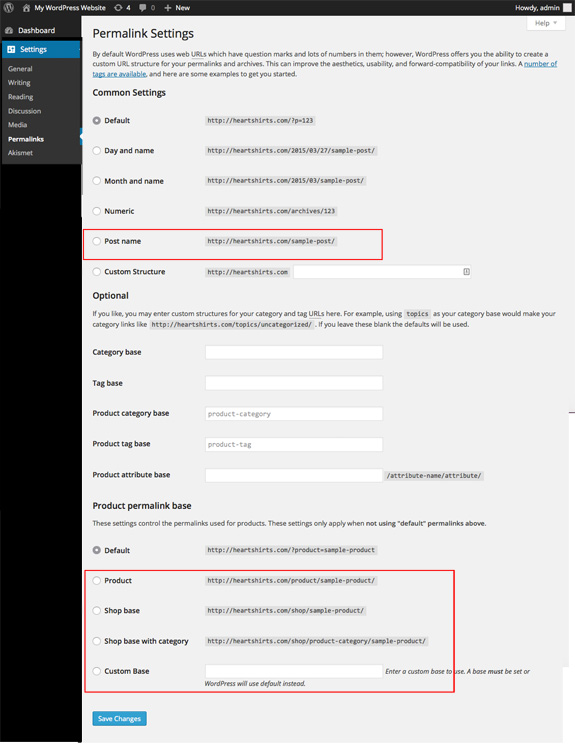
-
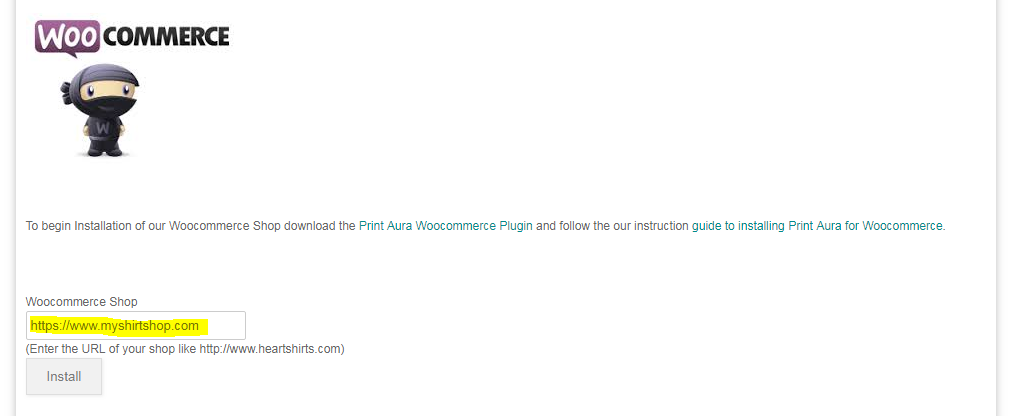
Step 7: Link Woocommerce Shop to Printaura
After the plugin has been installed and the servers settings are setup. The final step is to link your Woocommerce shop to your Printaura account.
Navigate back to the Woocomerce Authentication page. In the text box enter the URL of your Woocommerce shop and click Install
On the next page click Approve.
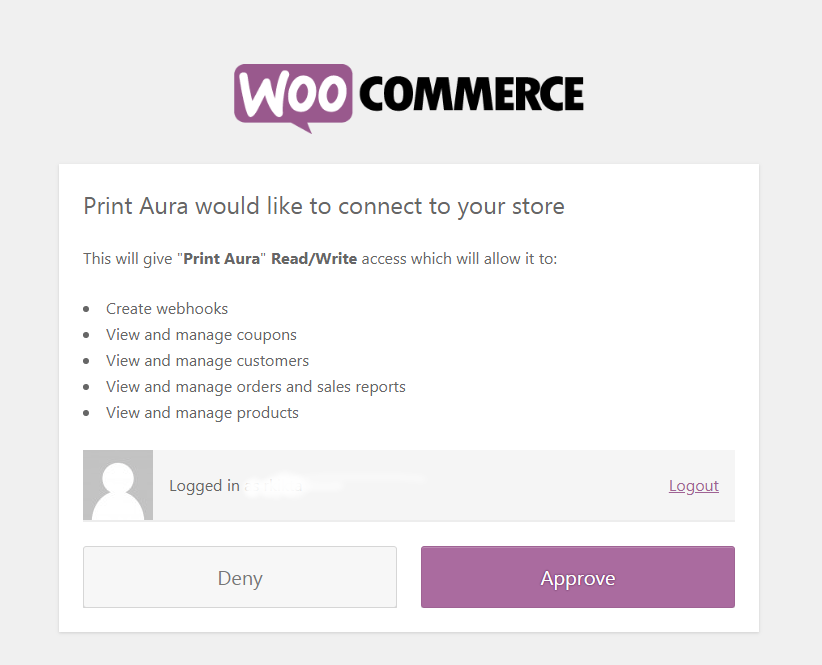
Your Woocomerce shop will now be linked to your Printaura Account.
-
Step 8: Trouble Shooting
If you are unable to link products or place orders please see our tutorial on troubleshooting woocommerce problems. Trouble Shooting Guide
